Nail Art Tutorial – Essie’s Negative Space Nail Art for Emerson at NYFW
During the last #NailGlossip chat, where we discussed runway nails, I threw down the gauntlet to Jen of The PolishAholic and our guest co-host Kellie Gonzo to re-create a fave look from Fashion Week.
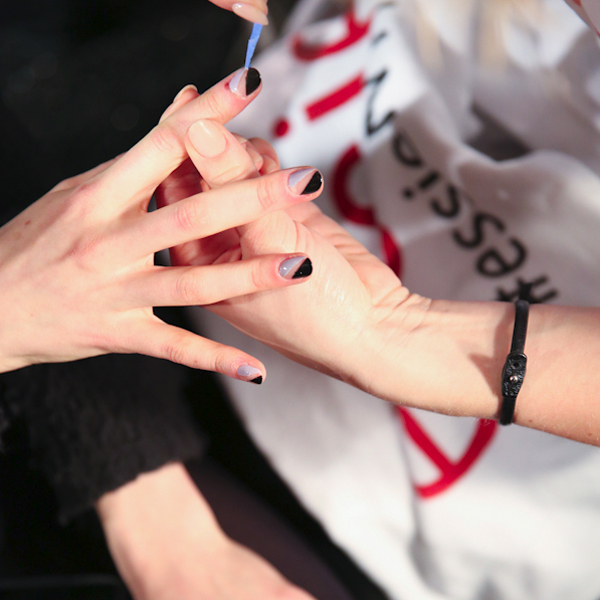
I’ve been scoping out the looks from NYC, London, Paris and Milan and the major nail art trends tend to lie with Moon Manicures, Non-Traditional French, Texture and Negative Space Nail Art. It’s the negative space designs that really caught my eye, especially the look created by Miss Pop Nails for Essie at Emerson by Jackie Fraser-Swan.
![]()
The Look – Miss Pop Nails for Essie
I love the graphic quality, clean lines and juxtaposition of colors used in this look. Lilac isn’t really a shade I gravitate towards but balanced with jet black, it really pops.
Heavily influenced by American Horror Story: Coven (a series I devoured), the designer’s collection included a lot of slashes, cutouts and negative space. Miss Pop Nails mirrored that in her nail art creation.
![]()
Get The Look
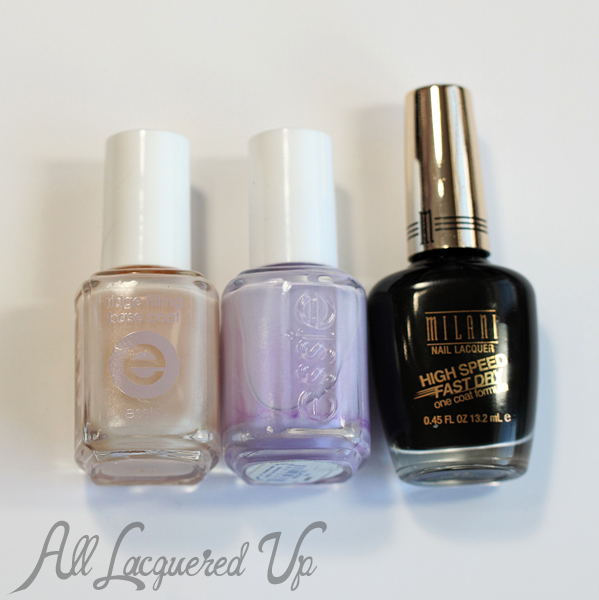
For the runway, Miss Pop Nails used Essie Ridge Filling Base Coat, Essie Lilacism, Essie Licorice and blue painters tape. Since I don’t own Licorice, I substituted Milani High Speed Fast Dry in Black Swift knowing that it’s pigmented enough to only require one coat.
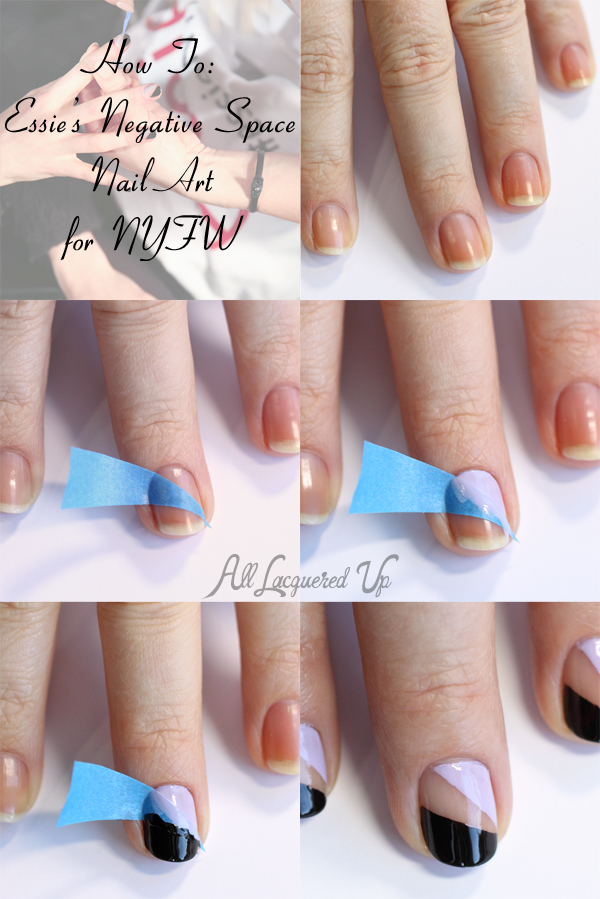
Step 1 – Cut triangles of blue painters tape.
Tip: To make sure that my spaces were evenly sized, I layered five pieces of painters tape and cut them all at the same time. If you leave a little gap between pieces at the bottom, they’re easy to pull apart and you get perfectly even isosceles triangles.
Step 2 - Apply a thin layer of Essie Ridge Filling Base Coat and let completely dry.
Step 3 – Apply a piece of tape, on an angle, from the upper left tip to the lower right corner of the nail. Press to make sure the tape is securely on the nail. You don’t want any polish to seep underneath.
Step 4 – Apply layers of Essie Lilacism to the lower exposed portion of the nail. I ended up using two coats.
Step 5 – Apply one layer of black polish to the upper exposed portion of the nail. And immediately pull up the tape with tweezers.
Step 6 – Repeat the process on all nails. Working one at a time is best to avoid the polish drying and sticking to the tape.
Step 7 – Clean up any polish mistakes and float a layer of top coat over the design, about 10 minutes later to avoid smudging.
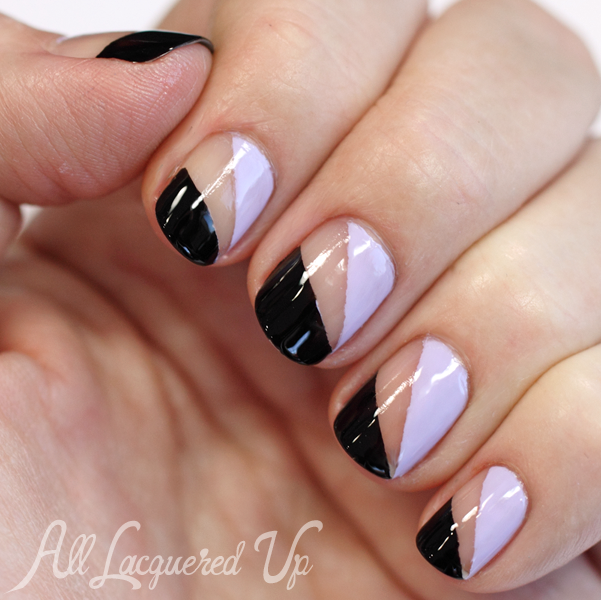
Essie Negative Space Nail Art
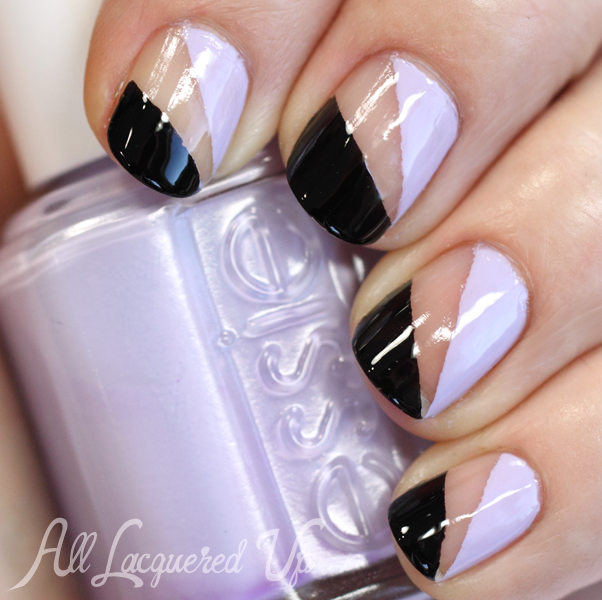
Essie Negative Space Nail Art
![]()
What do you think of the final look? Would you try this at home? Have you been scoping out the nails on the Fashion Week runways? Any specific designs that caught your eye?
Essie nail polish and products are available at salons and mass retailers nationwide and online at Beauty.com, Kohls.com, Macys.com and Nordstrom.com. Milani nail polish is available at drugstores and mass retailers nationwide.
Also, the next #NailGlossip is this Sunday, March 9th at 9pm EST. I hope you’ll join me, Jen and Sarah from Chalkboard Nails in this fun, hour-long Twitter chat.
Disclosure: Product samples were provided by reps for Essie and Milani. Affiliate links appear in this post. When you purchase through an affiliate link, you help support this site. For more info view my Disclosure Policy.


















Ooh I love this! Great recreation! I still need to try one of those gorgeous designs out
I love this. I just painted my nails a beautiful pale blue lavendar grey yesterday and was seeking some ideas to add creativity and drama to it and here you are with this wonderful mani!
Looks so edgy! The two colors pairs well together too.
I love negative space manis! Actually wearing one today — just an alt french look, but seeing bare nails is such a change when you’re constantly wearing bright polishes, haha.
I totally want to try this, but with the teal explosion I have on my nails now, I might have to wait a bit because I think my poor nails might be stained, which wouldn’t really work when rocking this look!
Lovely tutorial! Thank you for sharing, love that shade of purple too xx
I LOVE THAT! So gorgeous! xx
xx
This makes the negative space mani look so doable. Thanks for the step-by-step! I feel like this would probably look pretty cool with various contrasting colors too, but what is popping into my head is a nice orange color with a dark navy blue…
I’ve seen negative space manis several times and, for some reason, they creep me out. I can’t stand some of the bare nail showing with part of it polished. But then, I loathe those French manicures that are with white tips and a bare nail/nailbed. It’s that glaring white tip (and way too much of it), I think, that does it for me. Just leave the entire nail bare, with a topcoat! Or use a pretty soft sheer! I know this is just a quirk of mine. Most people, I’m sure, don’t feel like they could start foaming at the mouth when they see one of those types of French manicures!
This looks really awesome and easy to do! I can’t wait to try it out
Thanks for sharing this tutorial. So that is how to make this kind of mani. I will try it out and see if it looks great like this.
Emmy L its look great on my nails
I love this look, will be attempting to recreate it sometime this week!
gorgeous